Launch the LWUIT Resource Editor application from the utils directory under the LWUIT distribution directory.
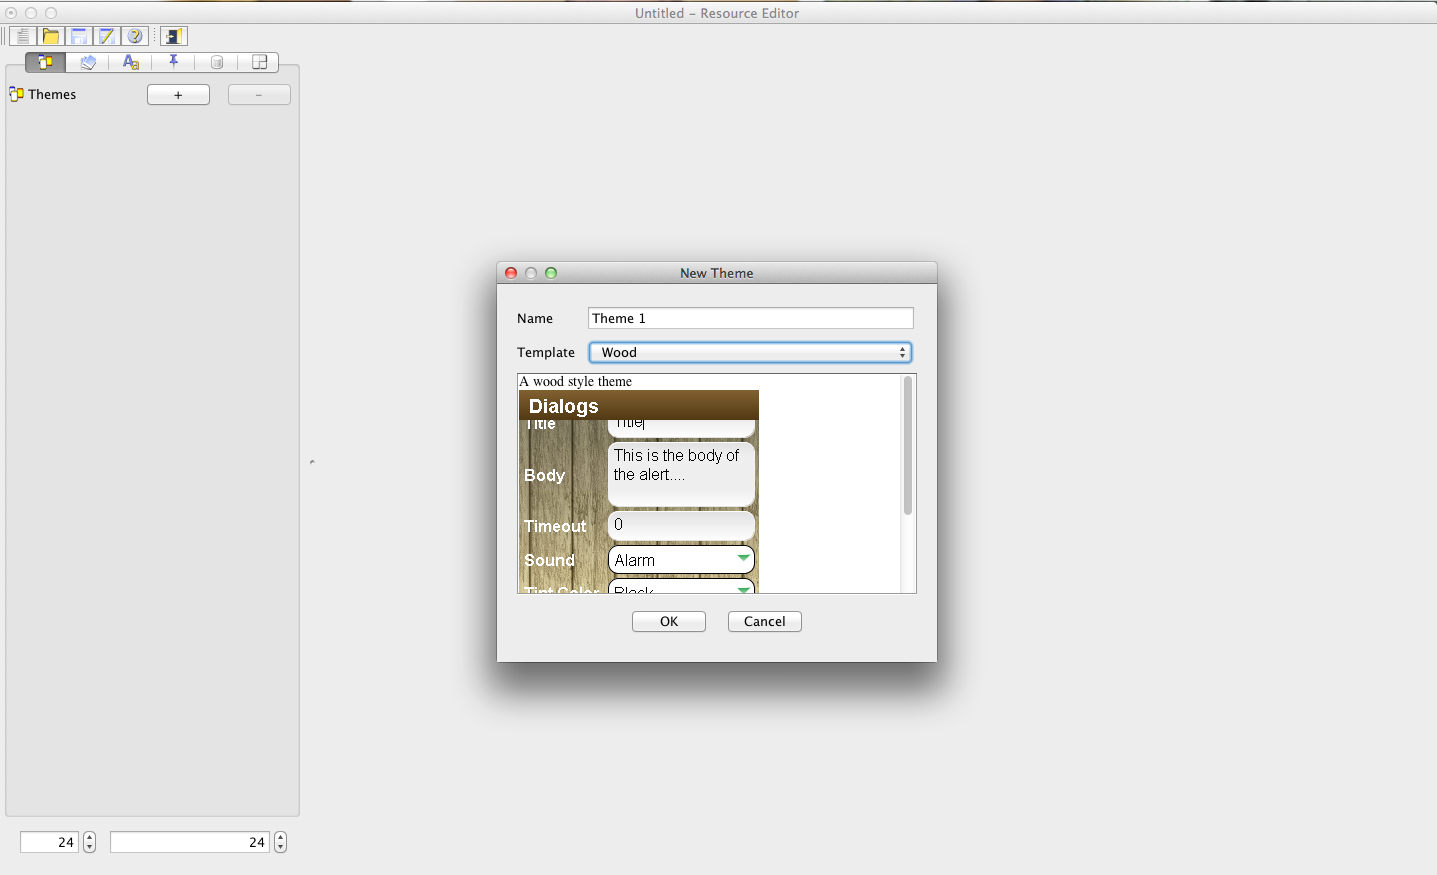
Create a new basic wood theme in the theme tab
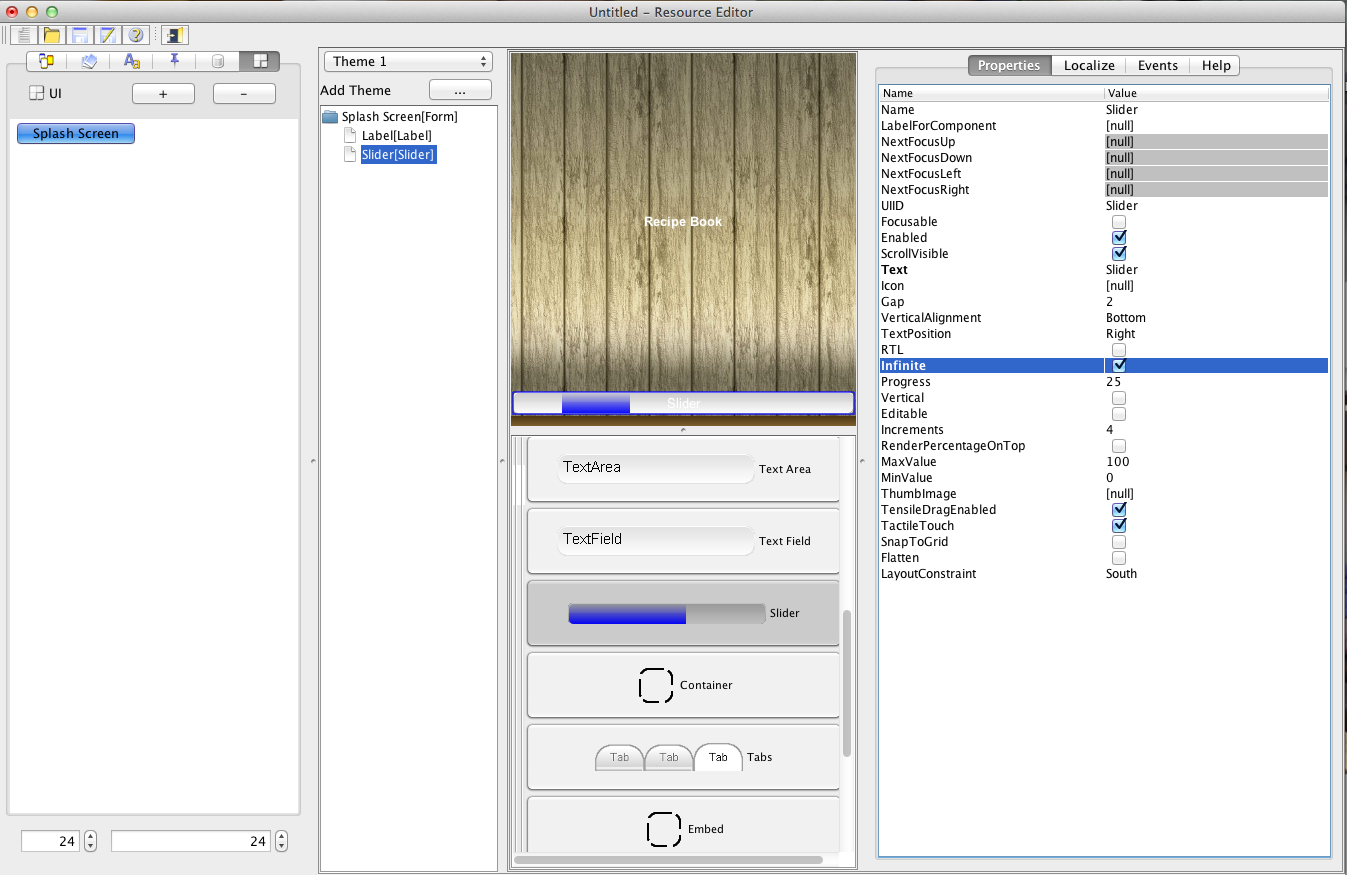
Go to the UI Tab in the resource editor and add a new UI entry, name it “Splash Screen” to create a new splash screen.
Set its layout to border layout with “absolute center” place a label in the center and give it the text Recipe Book.
At the south area place a slider component, set it to infinite mode and set its text to an empty string.
Create a new GUI form and name it Main. Go back to the Splash Screen and define next form as Main.
Set the title of Main to “Recipe Book”, set the layout to BoxLayout Y so elements may be organized from top to bottom.
Drag a Container into the form and select it. Set its layout to GridLayout with 2 rows and two columns.
Drag 4 buttons into that container and name them add, edit, exit & settings. Make sure to update their labels as well.
Use the “Images->Add Images” menu item and select the images add.png, edit.png, exit.png & settings.png


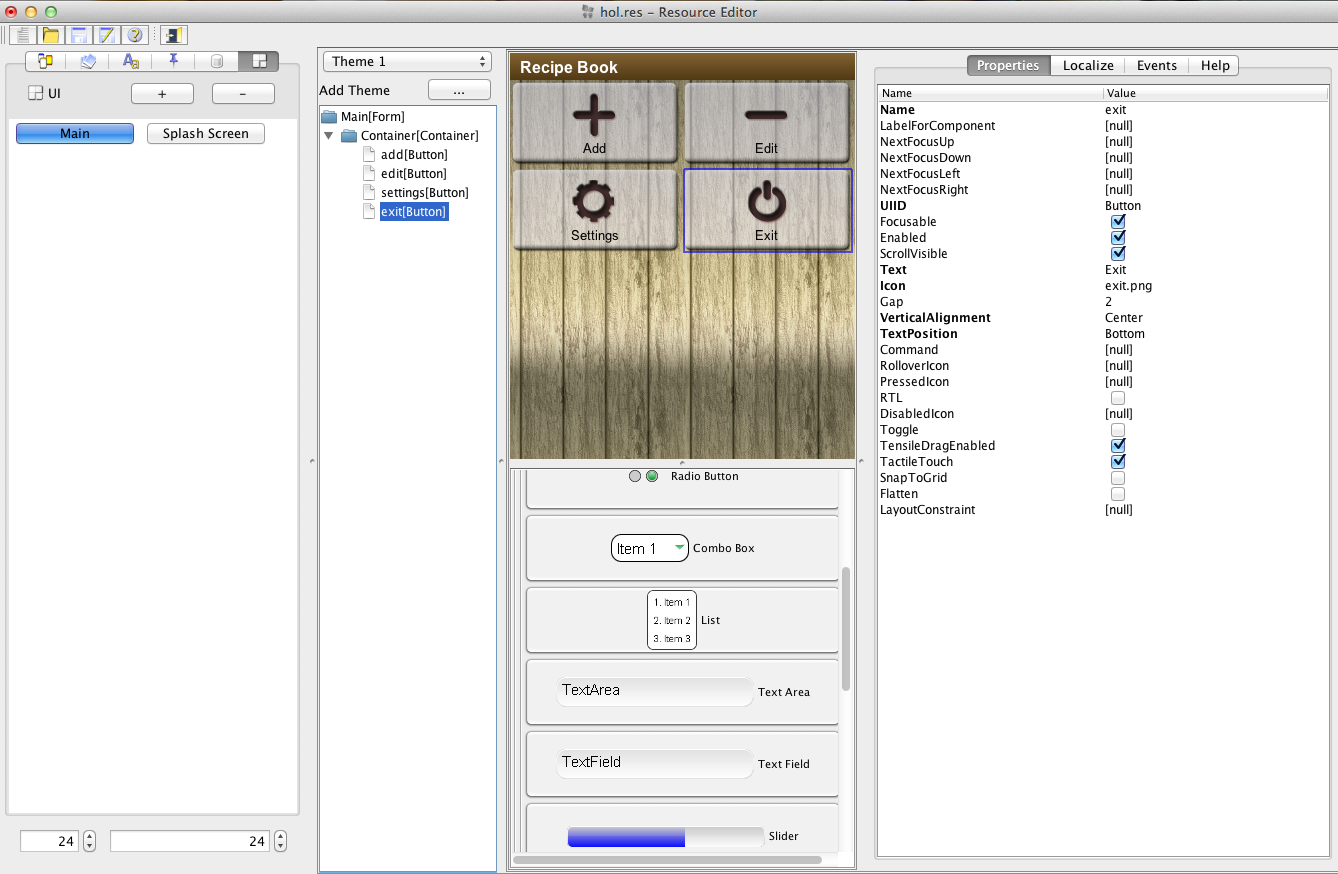
Go to each of the buttons, select the appropriate icon and set the text position to bottom. You should end up with a form that looks like this:
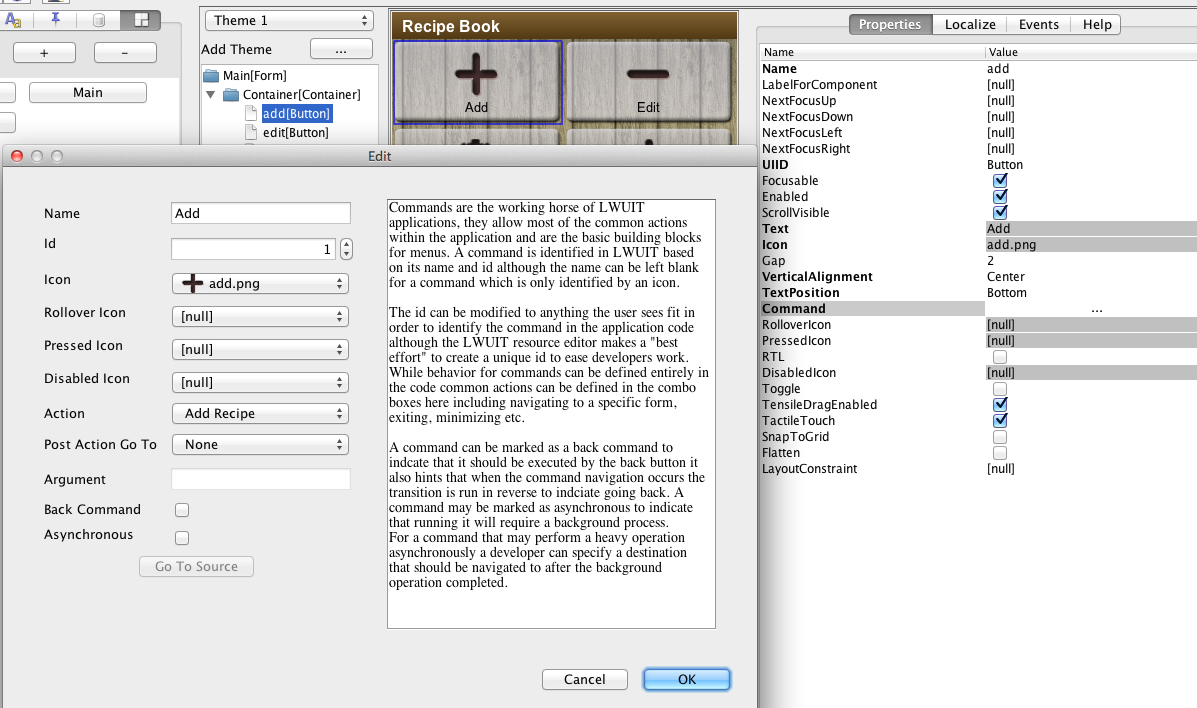
Create a new form and call it “Add Recipe” go back to the main form and select the add button. In the properties section click the Command entry, leave most of the defaults select the Action to point at “Add Recipe” which will trigger navigation to the add recipe page.
Click the exit button and click the command for that button, select the “Exit” action for this button.
Select the “Add Recipe” form and click the form. Set the title to “Add Recipe” set the layout to border layout. Drag a container into the North portion of the form and set its layout to table layout with 2 columns and 4 rows.
Drag the following components into the table layout container 4 labels, text field, combo box, text area & button.
Arrange the elements within the table layout container either by dragging on the tree or within the UI place all the labels to the left and arrange the component order so the text field is first, the combo box second the text area third and the button last.
Give the labels the following text: “Title”, “Type”, “Steps” & “Image”.
Give the components equivalent names to the labels besides them: text field = title, combo box = type, text area = steps & button = image.
Set the text of the text field to an empty string.
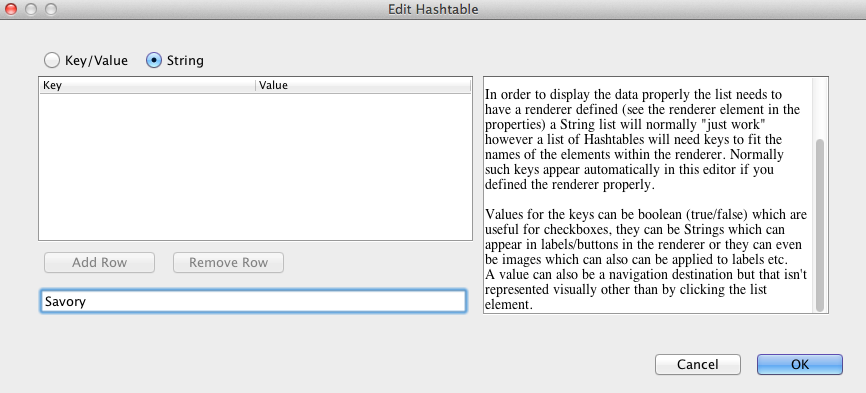
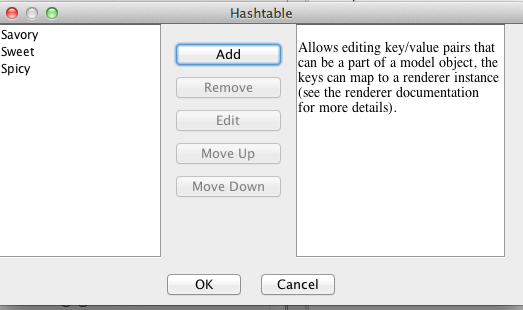
Click the list items entry in the combo box and remove all the “Item *” entries. Add 3 entries by selecting the String radio button and typing in the text field bellow the table. “Savory”, “Sweet” & “Spicy”:
This should be the result:
Select the text area and clear the current text, set columns to 20 and rows to 5.
Select the “Steps” label next to the text area, click “Layout Constraints” and set the vertical align to top.
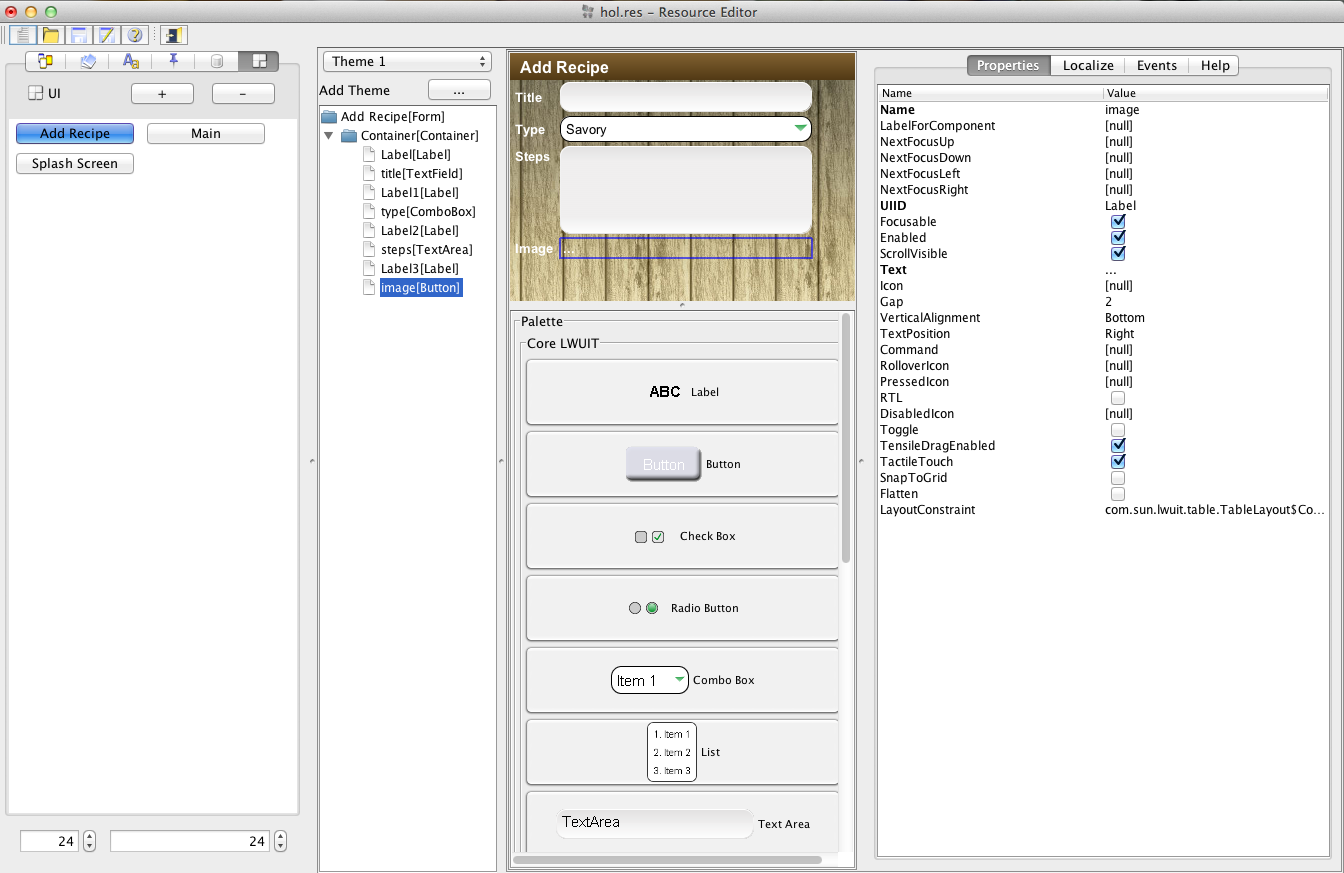
Select the button and set its text to “...”, set its UIID to “Label”.
You should end up with this:
Now you can actually go to the “Theme” section in the resource editor and play with a live functioning version of your application. Within the theme select the “Preview Settings” button and select “Splash Screen” as the first form.
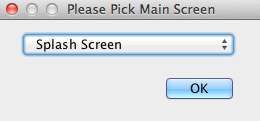
Select the Menu Item “Application->Generate Netbeans Project”.
You will be prompted to select the main screen select the “Splash Screen”
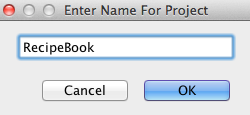
Then you would be prompted for a project name, its probably best to avoid spaces or special characters in a project name:
You will now receive a directory to which the project will be generated, notice that if you saved the resource file previously this old copy would be discarded and the resource file will now reside in the src directory under the directory you have given.
If Netbeans isn’t detected you will now be prompted to find the Netbeans executable under Program Files. Once the project is generated you should have 4 projects in Netbeans:
RecipeBook - Main library project where the cross platform LWUIT code & resources reside
RecipeBook_Desktop - Port to Java SE allowing you to rapidly run your code on the desktop and also generate Applets from LWUIT applications.
RecipeBook_RIM - Enables building native RIM applications from LWUIT applications.
RecipeBook_MIDP - Enables building MIDlets for J2ME mobile devices
Some of the projects might be marked in red for unresolved dependencies due to different emulator settings etc. If the RIM project is marked in red ignore it for now since it requires setting up a RIM environment. For the other projects right click the project and select properties, select Platform and make sure the proper environment is configured as CLDC 1.1, MIDP 2.0 and all the optional packages are checked (this is mostly for compilation and isn’t required in runtime).
Go back to the resource editor and select the “Add Recipe” form click the “Commands” entry and select “Add”. Type “Add” as the name of the command, select “Main” as the action of the command and click the “Go To Source” button (if Netbeans pops up go back to the resource editor) click OK to dismiss the dialog and press the save button in the resource editor toolbar (whenever save is pressed code is generated).
Go to Netbeans you should see the source code for the “Add” command callback:
protected boolean onAddRecipeAdd() {
// If the resource file changes the names of components this call will break notifying you that you should fix the code
boolean val = super.onAddRecipeAdd();
return val;
}
What we have is a method that will be invoked before the command is processed we can add our custom code to save the data. First lets create a recipe object, right click the userclasses package and select “New Class”. Give the class the name Recipe and enter the following fields:
private String title;
private int type;
private String steps;
private byte[] image;
Select the menu “Refactor->Encapsulate Fields” and select all the fields so you will have getters/setters for the fields.
Add an implements Externalizable to the class and make sure to import com.sun.lwuit.io.Externalizable.
You will be prompted to implement the missing methods, accept this prompt which will generate the following method stubs:
public int getVersion() {
}
public void externalize(DataOutputStream out) throws IOException {
}
public void internalize(int version, DataInputStream in) throws IOException {
}
public String getObjectId() {
}
Make sure to import com.sun.lwuit.io.util.Util for the following step, implement these methods as such:
public int getVersion() {
return 1;
}
public void externalize(DataOutputStream out) throws IOException {
Util.writeUTF(title, out);
out.writeInt(type);
Util.writeUTF(steps, out);
if(image == null) {
out.writeInt(0);
} else {
out.writeInt(image.length);
out.write(image);
}
}
public void internalize(int version, DataInputStream in) throws IOException {
title = Util.readUTF(in);
type = in.readInt();
steps = Util.readUTF(in);
int s = in.readInt();
if(s == 0) {
image = null;
} else {
image = new byte[s];
in.readFully(image);
}
}
public String getObjectId() {
return "Recipe";
}
Go back to the state machine to the onRecipeAdd method and add the following code:
protected boolean onAddRecipeAdd() {
// If the resource file changes the names of components this call will break notifying you that you should fix the code
boolean val = super.onAddRecipeAdd();
Form root = Display.getInstance().getCurrent();
Recipe entry = new Recipe();
entry.setTitle(findTitle(root).getText());
entry.setSteps(findSteps(root).getText());
entry.setType(findType(root).getSelectedIndex());
EncodedImage e = (EncodedImage)findImage(root).getIcon();
if(e != null) {
entry.setImage(e.getImageData());
}
Vector recipes = (Vector)Storage.getInstance().readObject("recipes");
if(recipes == null) {
recipes = new Vector();
}
recipes.addElement(entry);
Storage.getInstance().writeObject("recipes", recipes);
return val;
}
In the initVars method of the state machine you must register the recipe class as such so the deserialization code can work:
Util.register("Recipe", Recipe.class);
Go to the Main class in the Desktop project and the MIDP project and add this code just bellow the Display.init() call :
Storage.init("RecipeBook");
NetworkManager.getInstance().start();
Go to the resource editor and select the “...” image button, in the tabs pick the events tab and click “Action Event”. This should create a new method in the state machine class:
protected void onAddRecipe_ImageAction(Component c, ActionEvent event) {
// If the resource file changes the names of components this call will break notifying you that you should fix the code
super.onAddRecipe_ImageAction(c, event);
}
Update the code to allow image picking:
protected void onAddRecipe_ImageAction(final Component c, ActionEvent event) {
// If the resource file changes the names of components this call will break notifying you that you should fix the code
super.onAddRecipe_ImageAction(c, event);
final GoogleRESTService r = new GoogleRESTService(findTitle(c.getParent()).getText(), GoogleRESTService.IMAGE_SEARCH);
r.setResultSize(8);
final Progress p = new Progress("Searching", r);
p.showPacked(BorderLayout.CENTER, false);
r.addResponseListener(new ActionListener() {
public void actionPerformed(ActionEvent ae) {
p.dispose();
Vector results = r.getResults();
Container options = new Container();
for(int iter = 0 ; iter < results.size() ; iter++) {
if(results.elementAt(iter) instanceof GoogleRESTService.ResultEntry) {
GoogleRESTService.ResultEntry e = (GoogleRESTService.ResultEntry)results.elementAt(iter);
if(e.getTbUrl() != null) {
Button selection = new Button();
options.addComponent(selection);
ImageDownloadService img = new ImageDownloadService(e.getTbUrl(), selection);
NetworkManager.getInstance().addToQueue(img);
selection.addActionListener(new ActionListener() {
public void actionPerformed(ActionEvent ae) {
((Dialog)Display.getInstance().getCurrent()).dispose();
findImage(c.getParent()).setIcon(((Button)ae.getComponent()). getIcon());
c.getComponentForm().revalidate();
}
});
}
}
}
Command cancel = new Command("Cancel");
Dialog.show("Pick Image", options, new Command[] {cancel});
}
});
NetworkManager.getInstance().addToQueue(r);
}
Create a new form in the resource editor called “List Recipes”, go back to the Main form and edit the command for the “Edit” button so its action will be “List Recipes”.
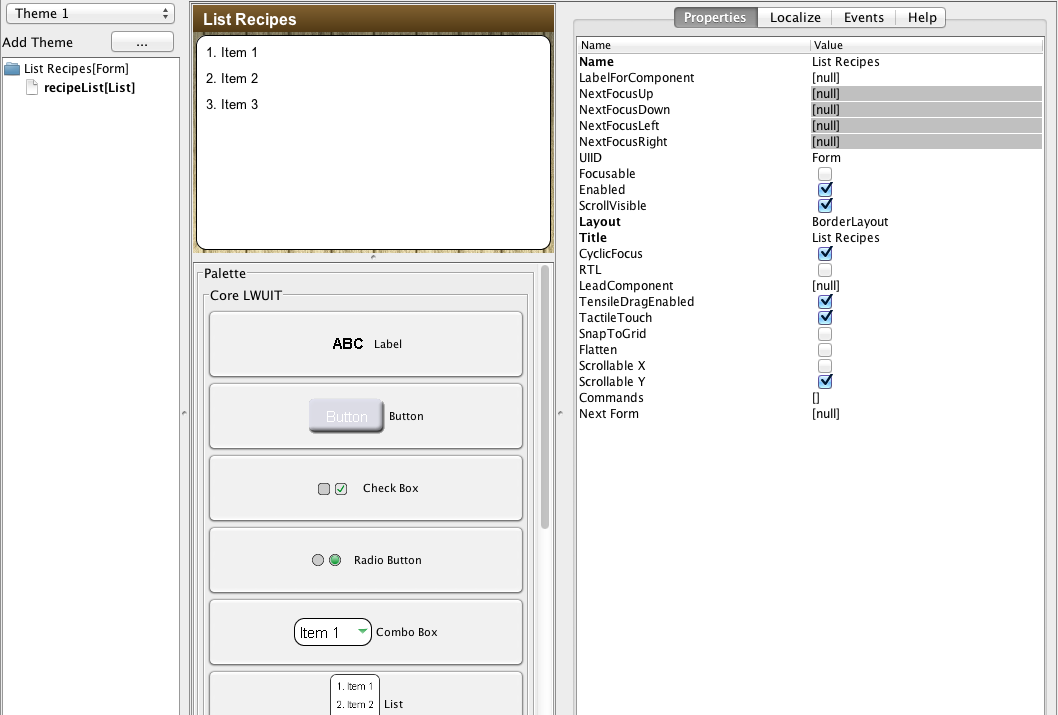
Go back to “List Recipes” and set the layout to BorderLayout, uncheck the scrollable Y property, set the title to “List Recipies” and drag a list to the center. Select the List and name it recipeList, move to the events tab and click List Model.
You should end up with something that looks like this:
Save the resource and go to Netbeans where a new method should appear:
protected boolean initListModelRecipeList(List cmp) {
// If the resource file changes the names of components this call will break notifying you that you should fix the code
super.initListModelRecipeList(cmp);
cmp.setModel(new DefaultListModel(YourDataHere));
return true;
}
Replace the setModel line with this code:
cmp.setModel(new DefaultListModel((Vector)Storage.getInstance().readObject("recipes")));
cmp.setRenderer(new DefaultListCellRenderer(false) {
public Component getCellRendererComponent(Component list, Object model, Object value, int index, boolean isSelected) {
if(value instanceof Recipe) {
Recipe r = (Recipe)value;
super.getCellRendererComponent(list, model, r.getTitle(), index, isSelected);
setIcon(r.getEncodedImage());
return this;
}
return super.getCellRendererComponent(list, model, value, index, isSelected);
}
});
Go to the Recipe class and add the following code to allow image caching:
private EncodedImage img;
public EncodedImage getEncodedImage() {
if(image == null) {
img = null;
} else {
if(img == null || img.getImageData() != image) {
img = EncodedImage.create(image);
}
}
return img;
}
In the Resource Editor select the Add Recipe form and select the menu item “Edit->Duplicate”.
Call the new form “Edit Recipe”.
Change the title for the form to “Edit Recipe”. Remove the “Add” command from the form and add a “Save” command instead.
Go back to the “List Resources” form and select the List & the events tab, within it select action event for the list. Go to Netbeans where you should see the code:
protected void onListRecipes_RecipeListAction(Component c, ActionEvent event) {
// If the resource file changes the names of components this call will break notifying you that you should fix the code
super.onListRecipes_RecipeListAction(c, event);
}
Add the offset field to the State machine class:
private int offset;
Then add the following code into the onListRecipes_RecipeListAction method:
offset = findRecipeList(c.getParent()).getSelectedIndex();
showContainer("Edit Recipe", null, c);
Go back to the resource editor and select the “Edit List” form, select the “Events” tab and click “Before Show”. Go to Netbeans where you should see this method:
protected void beforeEditRecipe(Form f) {
// If the resource file changes the names of components this call will break notifying you that you should fix the code
super.beforeEditRecipe(f);
}
Insert the following code into the method:
Vector recipes = (Vector)Storage.getInstance().readObject("recipes");
Recipe r = (Recipe)recipes.elementAt(offset);
findTitle(f).setText(r.getTitle());
findSteps(f).setText(r.getSteps());
findType(f).setSelectedIndex(r.getType());
findImage(f).setIcon(r.getEncodedImage());
Select the properties tab in the resource editor GUI builder and edit the commands of the form, edit the save command. Set the action of the command to list recipes. Click Go To source and press OK to close the dialogs that are open.
Go to Netbeans where you should now have:
protected boolean onEditRecipeSave() {
// If the resource file changes the names of components this call will break notifying you that you should fix the code
boolean val = super.onEditRecipeSave();
return val;
}
Insert the following code instead of the method body:
super.onEditRecipeSave();
Vector recipes = (Vector)Storage.getInstance().readObject("recipes");
Recipe entry = (Recipe)recipes.elementAt(offset);
Form root = Display.getInstance().getCurrent();
entry.setTitle(findTitle(root).getText());
entry.setSteps(findSteps(root).getText());
entry.setType(findType(root).getSelectedIndex());
EncodedImage e = (EncodedImage)findImage(root).getIcon();
if(e != null) {
entry.setImage(e.getImageData());
} else {
entry.setImage(null);
}
Storage.getInstance().writeObject("recipes", recipes);
back();
return true;
Go to the “Edit Recipe” form and add a command, name it “Delete” and press “Go To Source”. Press OK for both dialogs and save the resource file.
Go to Netbeans where you should see the following code:
protected boolean onEditRecipeDelete() {
// If the resource file changes the names of components this call will break notifying you that you should fix the code
boolean val = super.onEditRecipeDelete();
return val;
}
Insert the following lines instead of the method body:
// If the resource file changes the names of components this call will break notifying you that you should fix the code
super.onEditRecipeDelete();
Vector recipes = (Vector)Storage.getInstance().readObject("recipes");
recipes.removeElementAt(offset);
Storage.getInstance().writeObject("recipes", recipes);
back();
return true;
1)how to use painter class through resource editor?
ReplyDelete2)how to add row in table through resource editor ?
3)can we use record management system in lwuit?
Please I have a problem at level of execution. I can't see the result , when I run, I have a problem which is :
ReplyDeletePreverifying 6 file(s) into C:\Users\Fosso Mael Elvis\Documents\RecipeBook\build\preverified directory.
Error preverifying class generated.StateMachineBase
java/lang/VerifyError:
C:\Users\Fosso Mael Elvis\Documents\RecipeBook\MIDP\nbproject\build-impl.xml:380: The following error occurred while executing this line:
C:\Users\Fosso Mael Elvis\Documents\RecipeBook\nbproject\build-impl.xml:480: Preverification failed with error code 1.
BUILD FAILED (total time: 1 second)
please help me
How can I create a pointer like the one of a mouse with Lwuit
ReplyDeleteI've tried to build this app in debian 6:
ReplyDeletePreverifying 6 file(s) into /home/ali/NetBeansProjects/recipeBook/build/preverified directory.
Error preverifying class userclasses.Recipe
java/lang/NoClassDefFoundError: com/sun/lwuit/io/Externalizable
/home/ali/NetBeansProjects/recipeBook/nbproject/build-impl.xml:480: Preverification failed with error code 1.
BUILD FAILED (total time: 0 seconds)
as you can see there's no space here, I've set platform to CDLC 1.1 and MIDP 2.0, same error.
I could build it with unchecking "IO.jar" and "UI.jar" in the project libraries but the result (66kb) jar file is not installable.
For some reason the build isn't finding the content of the IO jar library. I'm not exactly sure how this happened. Make sure the base project has IO/UI and that they are unchecked.
ReplyDeleteThe sub project should have the IO MIDP and UI MIDP jar (the UI MIDP jar should be first). Clean and build both projects.
Codename One will eliminate all of these issues ;-)
How to dispose lwuit Form and Container objects in j2me?
ReplyDelete